May is the month to assemble pots and containers for the rest of the growing season. They aren’t just for summer; spared an early frost, tender container plants can still look great at the end of October, so it pays to devote some time and resources to getting them right.
Lushly planted containers bring the joy of gardening to the smallest of urban spaces. In larger landscapes, they help carry the garden through high summer, when the general show is dulled by the heat. They also have an important design role, in announcing an entrance, softening corners and even screening unwanted views.
The popular formula for composing a garden in a pot is to observe the mantra of “thriller, filler, spiller.” The reference is to a single upright specimen (thriller), annuals that trail over the lip (spiller) and others that fill the remaining gaps (filler). Some of my horticultural friends have grown weary of this principle. I think any clear concepts that help people compose with plantings are useful, so I’m not quite as dismissive of the prescription.
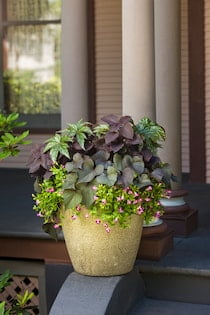
Bear in mind, though, that plantings that prioritize leaf ornament and texture above flower show offer stronger designs while being easier to maintain. In shade gardens, this is the only way to go. Leafy tropicals and other foliage plants including begonias, caladiums, coleus, cannas, ferns, dracaenas and philodendrons can be used for dramatic effect in the shade container.
Whatever compositional approach you favor, there are general techniques for success.
Choosing plants: Beyond ‘thriller, filler, spiller’
First, look for annuals that have been branded as superior performers, especially among petunias, calibrachoas and verbenas. They are sold as trademarked series. They tend to flower more and longer and shrug off the stresses of heat.
But even these share the container plant’s overriding need for regular watering, especially when in full sun. That may mean every day in 90-degree-plus weather.
If you want to move away from the thriller-filler-spiller doctrine, consider these approaches:

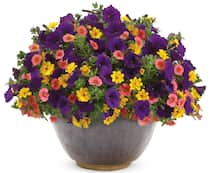
This combination shows three annuals blended into a single tapestry of flowers. The blooms are petunia Supertunia Royal Velvet, bidens Goldilocks Rocks and calibrachoa Superbells Coralina. (Proven Winners)
Blending: Ditch the thriller and the spiller and focus on the fillers so you can create an integrated tapestry with two or three varieties to great effect. You need annuals that are compact, compatible in their growth habit and similar in texture. The Proven Winners brand demonstrates this in one such recipe, with two plants of a yellow bidens, two plants of a rose-pink calibrachoa and one deep-purple petunia planted in a 16-inch pot.
Not all of them have to be high-octane bloomers; one might be a foliage plant such as coleus or sweet potato vine, though they would need periodic trimming to keep them in shape.
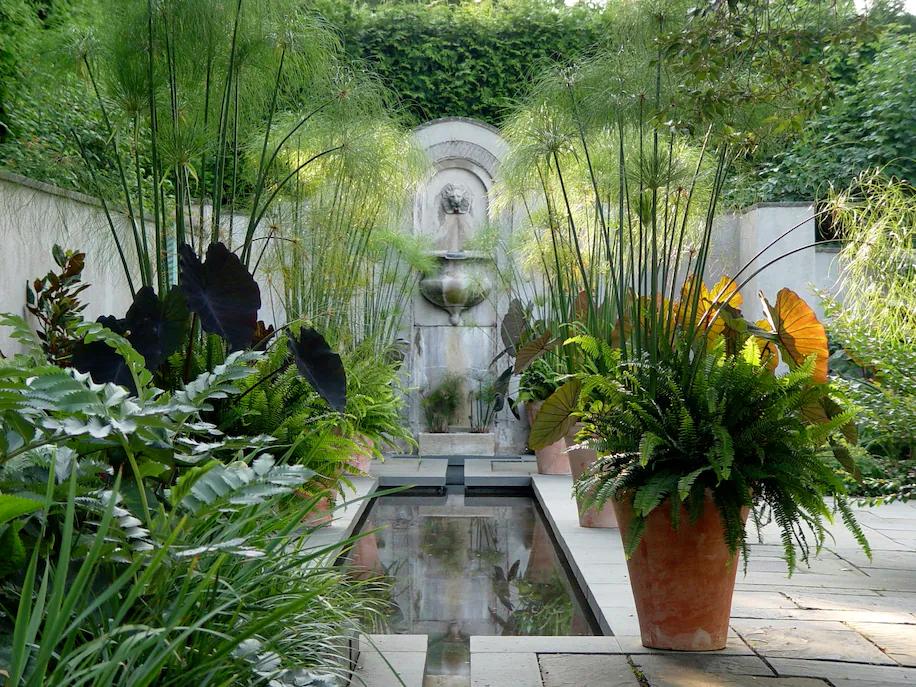
Stand-alones: Sometimes all you need is one starring plant in a pot. It should be dramatic in its growth habit, upright, and sculptural or cascading, for example. Discover its end-of-season size before picking its pot — plant and container should be similarly scaled.
There are plenty of choices for stand-alones in either sun or partial shade, including palms, papyrus, elephant ears (alocasias and colocasias), banana “trees,” angel’s trumpet, cordylines and bromeliads.
If the plant is somewhat bare at its base, it may look better with a planting around the edge of the pot, but this choice should be of a single and low-key variety that won’t compete with the main plant. Lysimachias, trailing small-leafed tradescantias, dichondra and sweet potato vines are some choices.

I asked Brian Sullivan, vice president for landscape and glasshouses at the New York Botanical Garden, for some of his favorites. One simple but effective example is a scented geranium in a 14-inch pot edged with a beautiful but underused oregano named Kent Beauty, which has trailing bracts resembling hops. As a sculptural stand-alone, he also likes the foxtail agave (Agave attenuata), cupheas and sticks-on-fire (Euphorbia tirucalli).
Nesting: Another approach is to assemble plant combinations — but in separate pots. That is, have a cluster of containers with each holding its own plant. For best effect, limit the number of containers to three or five, mix up the sizes, and have a clear starring pot. Avoid a gaggle of small, same-size pots, which will look busy and unplanned. Pot groupings are particularly useful in hard-edged corners, at changes of elevation or at important portals in the garden.
“The nice thing about these combinations is that if one fails, you can just swap out a pot,” said Sullivan. He suggests a three-container grouping with a 24-inch pot, an 18-inch pot and a 12-inch pot.
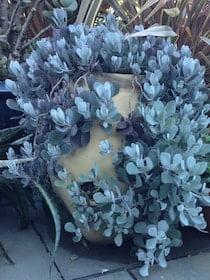
Succulents: Succulents remain popular for their shapes, colors, low cost and ease of care. Tender succulents work well outdoors during the growing season and free you of the regular watering regime.
Everything you need to know to assemble and care for a succulent garden
If you are transferring indoor succulents to life outdoors, don’t put them directly in full sunlight. They need some period of adjustment to the light levels to avoid scorching, and I would give the same treatment to newly bought succulents, which may have been raised in shaded greenhouses. Move them into brighter areas gradually, if at all. If you don’t have full sun, that’s okay; they will do fine in partial shade. They will sulk and stretch in full shade.
Most succulents are low-growing and look particularly at home in shallow dish planters. I am a big fan of sedums, echeverias and haworthias. Yuccas have fearsome leaf tips; aloes and agaves offer softer rosettes of foliage.
Choosing a container
The pot size drives the quantity of plants in the composition, but it also has a direct bearing on how well they do. The larger the pot, the less stress is placed on the plants; soil temperatures are cooler, the soil dries out more slowly and roots can go deeper.
The downside to large pots is that they are heavy, so assemble them where they will remain for the season. They can also devour large quantities of soil mix. Containers that are not freeze-proof, such as most terra-cotta pots, will have to be brought indoors before winter. Even frostproof concrete and fiberglass containers should be emptied and covered if they are spending the winter outside.
Metal pots or outer containers can get too hot for plants in the summer, especially if they are dark-hued. In Washington, I would use them only in shady areas.
Otherwise, the material of the pots is purely a function of your aesthetics and purse. You can spend a few dollars for a plastic pot or hundreds of dollars for a high-design container in fiberglass, clay or even concrete. The plants don’t care, except that terra-cotta pots can wick moisture away from the soil and dry out more quickly than, say, plastic. Glazed pots offer a good aesthetic compromise between cheap plastic and expensive styles. If you are feeling adventurous, you can use a brightly colored glazed pot as part of the planting design, but the brightest hues — lime greens, yellows, purples, crimsons — raise the risk of plant color harmonies becoming seriously discordant. Glazing that is a neutral or dark green, navy, or brown won’t clash with the plants above.
It is essential that pots drain to avoid rotting roots. Check to see that a pot has an adequate drainage hole, and do not place an outdoor pot on a saucer.
Watering
Pots are best irrigated with a watering can, in which you can add soluble feed, or with a wand attached to a hose. Don’t use a regular hose nozzle, which will either dislodge soil from the pot or, if used as a fine mist, be ineffectual or even harmful. Water at the base of the plant and try to avoid getting leaves wet to minimize fungal diseases.
If you leave an inch of space between the soil line and the lip of the pot, you can irrigate the container until the water level rises to the edge before soaking through to the bottom. That way, you know that every plant in the pot is getting watered and that the soil is fully saturated.
By late summer, the root systems can clog a drainage hole. I soak my containers until I can see water running out of the bottom. Some gardeners place their pots on clay legs for better drainage.

Soil
Correct soil is essential to success. Do not use pot soil left over from last year, which is compacted, full of fertilizer salts and possibly diseased. Do not use soil from the garden. Do not use bags of topsoil or seed-starting mix. Use freshly purchased potting soil. Potting soil typically consists of a mix of organic matter, peat moss and perlite. Many branded mixes also contain slow-release fertilizer, either synthetic or organic.
To save money on filling large and deep pots, many gardeners will fill the bottom third or half of the container with foam peanuts or other inert bulk material. Dan Benarcik, a container garden expert at Chanticleer garden in Wayne, Pa., advises against it. The fillers take away soil that the plants need and can make the container top-heavy, a problem in summer storms. Instead, he fills the bottom half of containers with compost.
Pot shards or gravel beneath the soil may help drainage but aren’t necessary if your growing medium is correct.
Succulents need extra amendments to the potting soil for drainage. If you can find it, chicken grit is excellent; otherwise, use builder’s sand and perlite. Mulch with gravel or grit.
Planting
The root systems of new plants should be teased open to encourage deep rooting, but use your hands and be gentle; many young annuals have delicate root systems. After planting and watering, the surrounding soil may have receded. Check and add new soil if necessary to prevent root exposure. Then add a shallow mulch layer to retain moisture. I like to use pea gravel.
By September and after weeks of pleasure, the effort expended in planting your containers will be but a memory.


